
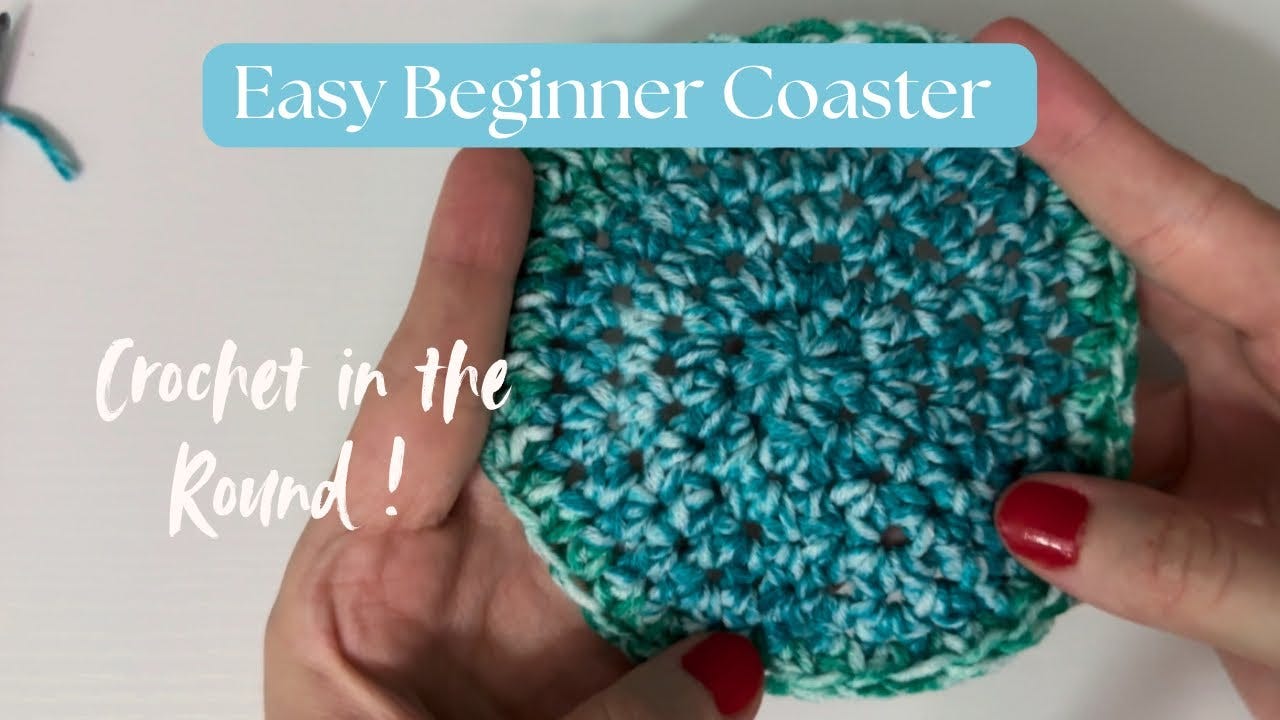
Beginner Crochet Coaster Pattern – Crocheting in the Round
Learn to crochet a circle and make a cozy coaster!

Ready to make your very first coaster?
This is a cozy little project to practice crocheting in the round without seams. Instead of slip stitching at the end of each round, you’ll crochet continuously, making a smooth, spiral-like coaster. Perfect for beginners!
If you’re brand new to crochet, check out my Beginner Crochet Playlist for step-by-step tutorials to help you along.
Quick Note on Crochet Rounds
Round 1 (foundation) is closed with a sl st.
From Round 2 onward, work in continuous rounds — no slip stitch joins.
Place a stitch marker in the first stitch of each round so you know where the new round begins. Move it up as you go.
Why this helps: Counting the foundation separately makes it easier to remember where your increases go.
Round 1: Increase in every stitch
Round 2: Increase in every 2nd stitch
Round 3: Increase in every 3rd stitch
Round 4: Increase in every 4th stitch
…and so on!
Project Supplies
Hook: 5 mm (or 5.5 mm if you need looser stitches)
Yarn: Size 4 (worsted weight) cotton or acrylic yarn
Extras: Stitch marker, scissors, yarn needle
🧶 Pattern Abbreviations
mr – magic ring
ch – chain
sl st – slip stitch
hdc – half double crochet
st(s) – stitch(es)
rep – repeat
Quick Increase Chart (Multiples of 8)
When you start with 8 stitches in a magic ring, each new round adds 8 stitches. Here’s how it works:
Foundation: 8 hdc in MR → 8 sts
Round 1: Increase in every stitch → 16 sts
Round 2: Increase in every 2nd stitch → 24 sts
Round 3: Increase in every 3rd stitch → 32 sts
Round 4: Increase in every 4th stitch → 40 sts
Round 5: Increase in every 5th stitch → 48 sts
Round 6: Increase in every 6th stitch → 56 sts
Round 7: Increase in every 7th stitch → 64 sts
Round 8: Increase in every 8th stitch → 72 sts
Round 9: Increase in every 9th stitch → 80
Round 10: Increase in every 10th stitch → 88
…and so on (add 8 stitches each round).
This same logic works for coasters, placemats, rugs, or any flat circle that starts with 8 stitches.
If you prefer to think in multiples, then you can consider your foundation round as round 1. In that case, each round just increases by a multiple of 8 (or whatever your starting number of stitches may be.)
Free Coaster Pattern
Foundation Round:
Make a mr, ch 1 (doesn’t count as a stitch). Work 8 hdc into the ring. Pull tight and join with a sl st to the first hdc. (8 sts)
Round 1:
Work 2 hdc in each st around. Place a stitch marker in the first st. (16 sts)
Round 2:
2 hdc in first st, 1 hdc in next st. Rep around. (24 sts)
Round 3:
2 hdc in first st, 1 hdc in next 2 sts. Rep around. (32 sts)
Round 4:
2 hdc in first st, 1 hdc in next 3 sts. Rep around. (40 sts)
Round 5:
2 hdc in first st, 1 hdc in next 4 sts. Rep around. (48 sts)
Fasten off, weave in ends, and wet your coaster to let it dry if it needs a flat finish!
Helpful Tips for Beginners
Magic Ring Help: If the magic ring feels tricky, you can ch 3 and join with a sl st to make a loop instead. You’ll just need to sew the middle shut at the end if you want the closed look.
Count Often & Use a Stitch Marker: It’s easy to add or skip a stitch by accident, so double-check your stitch counts at the end of each round.
Watch for Curling: If your coaster starts curling, it might mean your stitches are too tight. Try relaxing your tension or going up .5 a hook size.
Mix It Up: Use different yarn colors for each round to make a playful striped set of coasters!
Congrats! You just learned how to crochet in the round and made a practical little project. Don’t forget to check out my YouTube channel for more step-by-step tutorials and cozy projects to keep learning.